Category Archives: Modifications

Going nuts…

After having used the Stagg for a while now, I noticed that the nut slots could be a bit deeper, mainly on the E and A strings. So digged up a business card as a distance gauge and some small files and decided to have a go at it.

The Stagg nut is made of plastic which is not the best nut material to be honest… But nevertheless working on it went fine but it turned out that business card thickness was just a bit too little on the E string. There is no buzz on the E string itself but when plucking the A string the E string “clacks” against the fingerboard. Which I find quite annoying… Or course this only occurs while playing pizz (I play mostly arco nowadays (started in an symphonic orchestra recently) but I have decided to have a go at making a new nut from ebony in the near future…
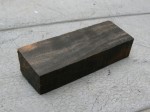
Ebony_for_nut-02So I have ordered a piece of ebony that was in my mail just yesterday. I showed it to my kids and they would not believe that wood would sink… So I proved to them that it actually does in a glass of water. Never thought a piece of wood could be educational!

In the near future I will try to make a new nut for the Stagg. I will document this process in this blogpost.

UPDATE
Contradictory to what I wrote earlier, I am NOT going to make a new nut in the future. The E string “clacking” has gone (or I have gotten used to it…) and the plastic nut works fine.

I am however going to make a new pickup for the Stagg as the stock ones do not work well when playing arco. But that is a whole different story….
Boink!

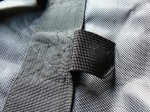
Gigbag_faillure-01Boink! That was the sound I heard yesterday when the strap on my bag snapped loose and my bass hit the ground 😦

Luckily the bass was not damaged but I was not amused… And I almost hit a woman sitting on a bench with the bass…

I already knew the Stagg bags are of pretty poor quality (see also this posting) but I had not seen this one coming… All the stitching that hold the strap to the bag came loose! So tonight I will be stitching it back on and I will most probably reinforce all other handle and strap attachments too…

Also some good news: yesterday I finally had the opportunity to show the bass to my teacher and he thought is was pretty good! Much better than the old black, unmodified Stagg that he tried earlier. Especially the improved neck angle and better bridge. He played pizz and arco on it and I was very pleased with the sound too (had not heard someone else play my Stagg) 🙂

Finetuning the bass

During the last 3 weeks the Stagg accompanied me on my holiday. Such a holiday is perfect for small imperfections to surface… And they did. This post documents a few minor tweaks I did after I got back from holiday.

Thrussrod rattle
The Stagg is fitted with a totally useless thrussrod. During my holiday I found out that the only thing it did very well was rattling in its slot. I tried to fix this using bathroom sealant. Read about it here.

Endpin got stuck
At the campsite we had bbq that ended in a jam session. I could not join as I did not bring my amp but I did show the bass on request. Only to find out the endpin got stuck in the new plug. I knew the fit was quite tight and after taking it out there appeared to be some transfer from the (softer) aluminum to the steel of the rod. After carefully removing this the rod was OK again. Something to keep my eye on.

Endpin rattle
EndpinRattleInside_1At the campsite I mainly used the bass with the pin as far in as possible. This leaves a long part inside the bass which is a possible cause for vibration. So while I had the pin out anyhow I decided to make an endblock that fixates the endpin when it is as far in as possible.

EndpinRattleInside_2This might well be the most unnecessary modification I have done but it took only a few minutes. I made a maple wooden insert with a 10,5 mm hole in it. The endpin was chamfered a bit more  so it would “guide itself” into the hole. The block was made to exact size and fitted with a couple of screws. When the pin is in the block it is under a bit of tension so it will not rattle.

Battery compartment
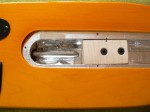
BatteryCushionAnother modification that might not be all that necessary is fitting some padding material to the battery compartment to prevent possible rattling. It implied nothing more than sticking two pieces of foam tape inside the compartment and on the lid. Better safe than sorry 🙂

Body support and tuner
BodySupportTuner_2The body support that I made for playing seated turned out to be on the wrong side of the bass. At home, sitting on a high bass stool, everything was ok, but on the campsite, sitting on a picnic bench the balance point proved to be a bit off. So I moved the body support over the left hand side (G string) of the bass. My first impression is that this position feels a lot better, the bass appears to be better balanced. But time will tell I guess…

I used (and have hidden) the hole on the right hand side to fit a small Planet Waves NS micro tuner. This way this can stay on the bass permanently and not look obtrusive. And I won’t get caught again without a tuner!

Apogee JAM
apogee-jamThe last thing I did was treating myself to an Apogee JAM guitar interface. With this nifty little device you can connect an electric guitar, or EUB, to an iPhone, iPad, Mac or PC and record the sound in an application like Garageband. I wanted to be able to hear myself back for a while and this makes it possible. I have yet to find out the optimal settings but is is very “educational” to hear yourself play…

Thrussrod

As I wrote at the bottom of my posting on the finished honey Stagg I started to notice a buzz on the D string. I decided not to tinker with the bass until after my holiday. The bass would accompany me and would sure show all things that would need further work during those weeks. But the buzz or rattle, don’t know the best term to describe it, became worse and worse and started to occur on all strings. As I had eliminated most sources for this noise before I was pretty sure the thrussrod was the culprit…

The Stagg EUB is fitted with a thrussrod. But with the thickness of the EUB neck this is totally useless. Turning it (counter)clockwise as far as possible has no noticeable effect on the neck whatsoever. On both Staggs. So the only thing I did a while back was to give it a little bit of tension to prevent it from rattling in its slot. But obviously this was not enough…

I borrowed a allen key from the campsite owner and tried several adjustments to eliminate the rattle. It worked for about 80% but there was still some rattle left. As the rod cannot be taken, the only way of preventing it from rattling is filling the slot with something to prevent the rod to move at all.

NeckSiliconeWhen I got back from holiday I to took off the neck again (which also gave me the opportunity to take some more pictures for the post on the neck angle). Tapping on the bare neck showed that I  guessed right, I clearly heard the rod rattling in its slot… Adjusting the rod made little or no difference at all…

So I drilled three holes the rear of the neck until I reached the thrussrod. After that I pumped some silicone bathroom sealant in the holes hoping this would reach the thrussrod slot. Well, it seemed to  work as the rattle has gone now!

Endpin… again

Being fed up with the rattling and moving endpin on my honey Stagg I decided to fix it once and for all. The movement is due to three things: the long extending length of the pin, the cheap plastic the endpin plug is made of and the fit of the plug in the bass body. After some thinking on it I decided I had two options:

  1. change the whole assembly for a normal DB endpin en plug
  2. make a new, good fitting plug from a better material

As I had already put some effort in making a new rubber tip for the stock pin and did not want to spend a lot more money on the bass at this moment (the money paid for the new amp was still fresh in my memory…) I decided to have a go at option 2. I knew I had a piece of 35 mm diameter aluminum rod in the workshop somewhere and that would make a good starting point for a new plug.

The pictures below describe the process of making a new plug step by step. The new plug has been chemically blackened afterwards using Birchwood Casey Aluminium Black and the fixing screw has been threaded directly into the aluminum.

The plug has a tight fit in the bass body and is fixed by two countersunk screws that screw into the aluminium of the plug. I made the part of the plug that goes onside the bass body about 20 mm longer to give more support. The pin itself did not fit in the 10 mm hole I drilled… The “10 mm” pin actually turned out to be somewhat larger in diameter… So I had to ream this out a bit. But now it is a nice and tight sliding fit.

Below you find the pictures from raw material to the mounted plug. So far I can feel no play anymore and the rattle is gone too. Time will tell if this will stay that way.